... Or, that's a lovely card but how are you going to get it in an envelope?????
Have you seen the gorgeous Webster's Pages paper pads in the 3DJean store? Mmmmmm, totally delicious. I used some of the papers from the Collection Triple Pack which includes the seaside retreat, garden gala and nature's storybook collections.
Here is the card I made using the gorgeous papers, some felt, hand stitching, a paper rose and a bit of paper curling which is my newly found addiction. I recently discovered Stacey Cohen's blog and love how she incorporates paper curling into her projects.

Anyway, I made this card at our last crop day. I drew the big flower shape onto the back of the paper, cut it out and then glued it onto felt before trimming around it and adding some stitching around the petals. The paper rose is just a circle shape cut from paper then cut into a spiral, twisted around and glued with glossy accents at the bottom to anchor it. I poured glitter into the flower to cover the glossy accents then just tipped the excess out when the glue was dry. When the card was finished I gave it a generous spray of Shimmerz Spritz to give it some subtle sparkle.
Once I had finished my card I sat there contemplating the beauty of it - as you do at crops when you actually manage to fit some crafting in between chatting and eating and even more so when you actually finish something!! when I heard a voice from the other end of the table (Jean)
"that's a pretty card, don't know how you're going to get it in an envelope though?"
Easy I said, I'll make it a box :) and this is how I did it ...
From cardstock cut two shapes like this, fold along the lines - this is where a scoring tool and board comes in handy but if you haven't got one then use a ruler and a blunt pair of scissors to score

You'll have two pieces of cut and folded card, one running across and one running upwards

Tape the folded flaps of the piece that goes from side to side (the first piece in my photograph) and join to the other piece making sure the flaps are in the inside of the box, tuck the flap in at the bottom and tape that too. The big flap at the top goes on the outside and will be decorated.

Now you'll have a plain box

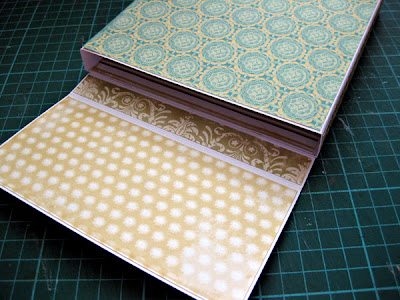
Trim and glue coordinating papers to cover the front, back, sides and inside too


Add some embellishments to the flap using the scraps from making the card and the box and tie a pretty ribbon around from top to bottom which will keep the box closed. I sprayed my box with more of the Shimmerz Spritz to give it just that little bit more glitter and sparkle :)
 My card

My box
 My finished project

Supplies:
Webster's Pages paper pad and Shimmerz Spritz from the 3DJean shop
Martha Stewart border punch
Felt
Scalloped circle punch
Embroidery cotton
Rikrak
Papertrey Ink sentiment stamp, ribbon and flowers and scallop die
Glitter
Glossy Accents
Glazed brad
Have fun, love Andrea x

That's fabulous!... love that flower... I feel a little card lifting comming on!
ReplyDeleteYou are far too talented Andrea. I love this card and box.
ReplyDeleteI too wondered how you were going to get that beautiful card into an envelope but I can see you had a plan. So impressed that you used your scraps to cover it.
ReplyDeleteLove the rik rack and mini tag. Lovely jubbly. x
ReplyDeleteLovely card.......lovely box !
ReplyDeleteLovely! Now how are you going to get it in the post? Lol!
ReplyDeleteThe box is as pretty as the card!
ReplyDeleteLove Dawn xx
It's beautiful and I can say that with hand on haert since it is one of the things that came in my jam packed pizza box full of goodies...thank you very much...Kirsti x
ReplyDelete