Thursday 29 December 2011

Julie: Dahlia Flower Cabochon card

Hello again.

Here's a quick and easy cardmade special by the addition of three dahlia flower cabochon:
I used Nesties to build up a few layers before adding a vintage image, a greeting, and finally the resin flowers:
I don't think I'm alone in sometimes thinking "I'll only use one of these on here." when I like an embellishment so much I want to make them stretch a bit further! Yet sometimes it's worth being bold and using more than one at a time, because they can look so nice clustered together in a group, especially when they coordinate with the colours in the rest of the card:
And here are the cabochon I put to use today [click image to visit the shop].
 Thanks for visiting here today and if you haven't visited the shop today then just follow this link to see the latest products which have landed on the 3DJean doorstep. 

See you again.


Tuesday 6 December 2011

Julie :: Cosmo Cricket Christmas cards

Hello again.

Today's project is something a little bit festive: a set of cards featuring papers from the Cosmo Cricket 'Dear Mr. Claus' 6x6 pad along with a pack of the Mixed Christmas Colour Carnation Flowers, both of which are available in the shop now:

The cards I used were only 3x3 inches, and I had an idea to select out a central image from the paper designs and give them the  feel of a festive - retro - postage stamp:
I covered the front of the cards with one of the less patterned designs, stitched around the square, wrapped seam binding / raffia / lace around them and then layered a perforated stamp die-cut on top:
Finally a stamped greeting and a single paper carantion took up the last bit of decorative space on these tiny cards:
That's my last post here before Christmas - so Season's Greetings to you!

Julie :-)

Products used:

Thursday 24 November 2011

Jan:Who's that looking through the window

why it's Rudolf (Octopode Factory Stamp).

This cute stamp is perfect for a window card. His red nose just shines through.
 His antlers have been highlighted with those sparkly Stickles

 I've used Crate paper from the  Peppermint range to decorate the outside of the card.
Pop over to the shop to gather your supplies ready for the festive season, only 31 days to go!

Thursday 17 November 2011

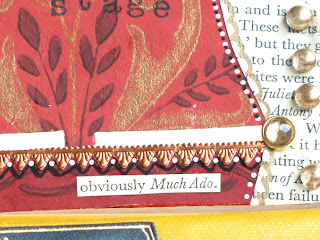
Julie: Mini stage-set complete with actors!

Hi there.

Today's project was a way for me to add a little bit of drama into a birthday gift:

Like me, the birthday-girl in question loves Shakespeare so hopefully she's enjoying this little scene [It's her birthday today and she should already have opened it - so this shouldn't be spoiling the surprise!]

If you managed to grab one of the recycled chipboard Artchix Scalloped Stand Up Stages then here's how you can create a stage set with it. [They're out of stock at the moment but you could make something very similar from one of the shrines which are still available].
  • Cut two narrow slots near the bottom of the stage then cover the front with decorative paper.
NOTE: If you want your stage to be able to fold flat at some point [for posting or storage] DO NOT paper-over both the front of the stage AND the tabs. Cover the tabs separately so you can still bend them flat.
  • Trim-off the excess with sharp scissors / craft knife and cut away the paper which will now be covering the two slots.
  • Create stage-curtains from old book pages - mine were from a book about Shakespeare.
  • Embellish with Dewdrops then decorate and define edges with black and white poster paint pens. 
  • Assemble an Artchix paper doll [I used the Garden Fairy set] and fix her arms to the body using brads so she can move. And, as she's mingling with the stars I gave her a German Scrap copper Renaissance border as a belt.
 You could create both your characters from the Artchix doll sets or you could print out a special guest star like I did!
  • Fix your 'actress' to a lolly-stick using a strip of card, bent at a right angle, slide the lolly stick into the slot in the stage:

  ... and hey presto! You're now the proprietor of your very own theatre and cast!

 Now, what you choose to act out with them is entirely up to you!

See you next time.

Julie


Tuesday 8 November 2011

Last Post by our Guest Designer SUE RODDIS

A BIG thank you to Sue for her lovely creations as our Guest Designer.

Using the Octopode Factory image sheet Woodland Creatures Sue has made some lovely bookmarks.

These could be made using any of the Octopode Factory Image sheets and there are lots to choose from.


The background papers used are the Studio2Mers.


Tuesday 1 November 2011

A Night with the Angels

A night with this Angel actually lol

Gail and I got together the other evening and had a play around with these lovely NEW 3D Angels.

The white one is covered with plain white paper , the A4 type you use for printing on , which has just been embossed with a christmas themed embossing folder. A few punched snowflakes , a christmas word and a sprinkling of stickles.

The other was covered in some old Basic Grey christmas paper and then all the edges sprinkles with silver vintage glass glitter.

Tuesday 25 October 2011

Julie: ArtChix paper doll layout

Hello again.

My project today features a few of the newest additions to the 3DJean shop:
  • Art chix paper dolls and
  • Art Chix German Scrap borders and wings.
And here it is:
The paper dolls come on a sheet of cardstock and I had great fun deciding which outfit to dress mine in. In the end I went for tartan arms, flowery dress and harlequin style tights:
 What do you think? I also gave her a set of dragonfly wings plus copper German scrap set ... because a girtl can never have too many pairs of wings in her wardrobe can she?

Same goes for green wellies, of course!
 Although Jean no longer stocks the Shimmerz paints, if you do have any from when she did you might want to try sponging it through sequin waste to give a similar effect to spray inks - but with more control over where your colour goes.

Here's some of the German Scrap Renaissance Borders:
While they may not immediately spring to mind as a scrapbooking supply I think they work really well and combine perfectly with my mix of modern and vintage elements on this particular page.
Here's the products I've used today:

Thanks for stopping by to see my project, I hope there was something in it which you might take-away and put your own spin on. 

I'll be back here in 3 weeks time, but until then you can visit me on my blog: notes on paper

See you soon,

Jullie :-) 

Friday 21 October 2011

Boo!

I love things in boxes and I love shrines..... these little shrines are fab. I inked and added some Disress Embossing powder and now it looks like rusted metal.
I punched small holes in the edge and glued some fab German scrap around the top.
More German scrap along the bottom. The tiny letters and patterned paper are from
Collection Elements.


Effie


XXX

Saturday 15 October 2011

I've Been...........

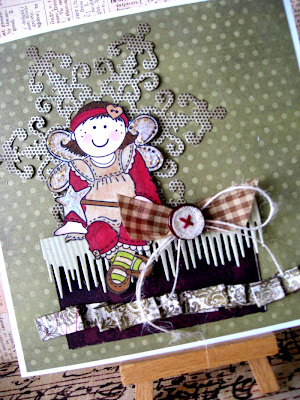
..hit with the cute stick again. I do like to get out of my box every now and again and makingcute cards do just that. I find this kind of thing so difficult so I set myself a challenge with this stamp.


She does have a mouth and I have to say they do stamp beautifully.


I'm not a great colourer inner but I did find it quite theraputic.


I think they turned out OK... but there'[s still room for improvement.


But for now I'm getting back in my box!


Effie


xxx

Tuesday 11 October 2011

Bird houses


It's time for my third piece as guest designer......a little later than it should be but hopefully better late than never!
I took one of the Collections Elements small boxes and covered it with Collections Elements Antiquing Tissue


Next I took a some of the Collections Elements tiny houses and covered the fronts with scraps of the Studio2Mers papers and the backs with more antiquing tissue trapping thin flat sticks (coffee stirrers from places like Starbucks!) underneath it.
Colour the tissue and the sticks with black ink.


The next step is to stamp The Octopode Factory birds onto card and colour them and then cut them out. Next attach them to more coffee stirrer sticks.
Cut slits into the lid of the box and push the sticks through them arranging the houses and birds at differing heights.


Finally run a line of glue around the edge of the box lid and tip over some vintage glass glitter, leave to dry and then tip off the excess. Add some glitter to the card circles that come with the box kit and then glue these to the top of some of the houses.
Related Posts with Thumbnails