Tuesday 31 December 2013

Julie: Scrapbooking 2014 ... with 52 Weeks of Photos


Hi there.
 
Are you a scrapbooker, or a scrapbook-curious crafter, looking for a fun way to document the coming new year? Then why not join us in the 52 Weeks of Photos challenge?
 
If you're a regular reader here you'll know that the 3DJean Design Team have been working their way through taking one of the 52 categories of photo from the list each week for several months now ... but you can still join us in using the list any time. And there's no better time like the start of a new year to pick up a new creative project!
 
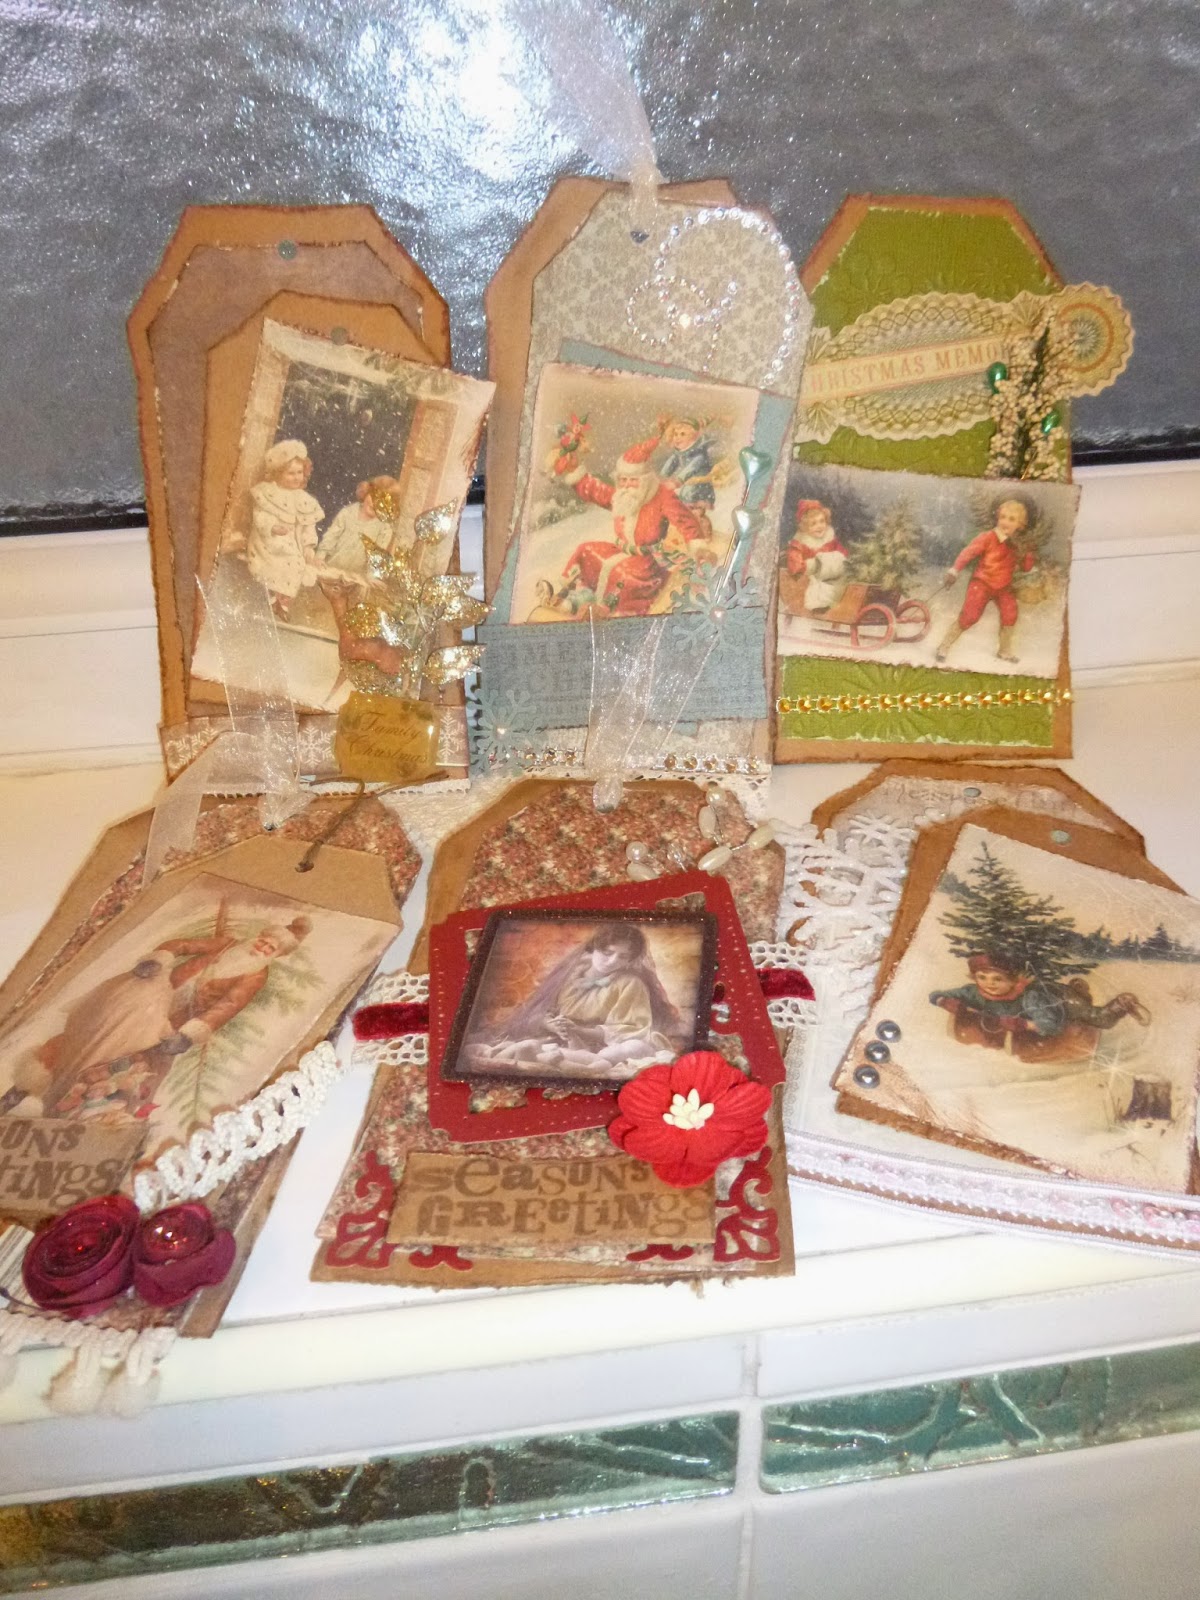
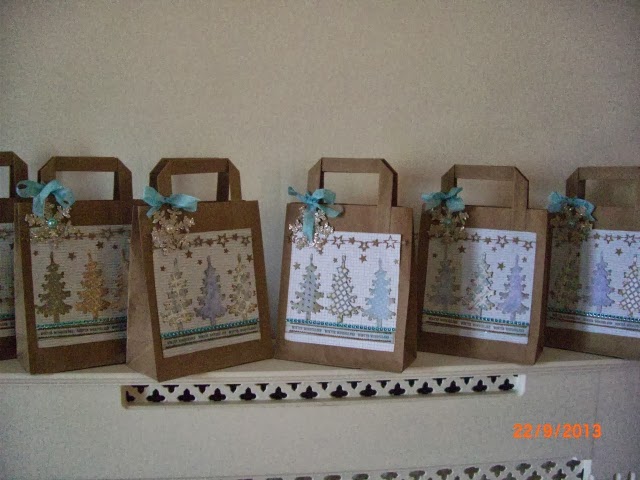
Here's a month's worth of my photos which I've been scrapping in 4x6" pockets:
While I do take a fresh photo each week, I don't scrap them straight away; I save them up and scrap several at a time, usually when I go to my local crop. And the small format I've chosen means it really doesn't take that long to achieve a colourful and interesting re-cap of my year!
 
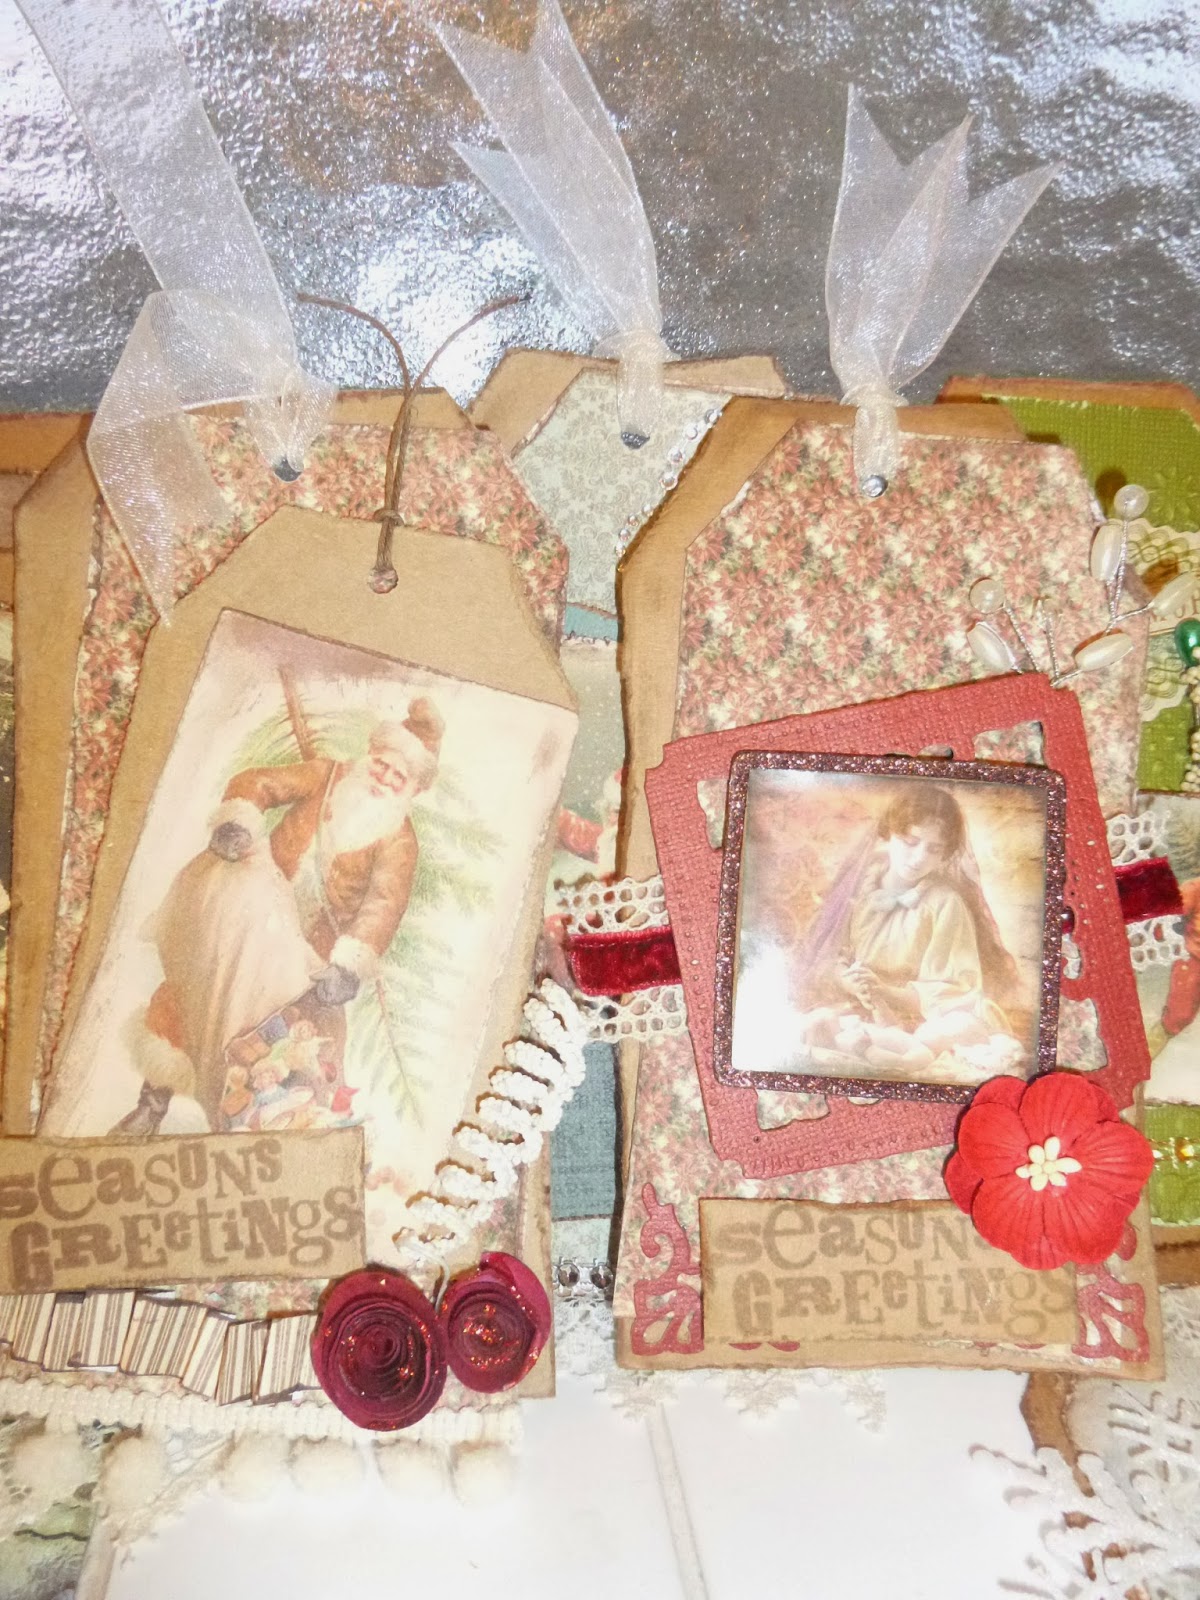
Here's a few close-ups to show you what I mean:
I've been using lots of the retro-style blank tickets from the shop as little journaling blocks [there's 60 for £1.00 so it's fine to use so many!] and I combine them with either handwriting or my faithful date-stamp:
And here I used a blue one beneath frame:
 ... to create a little layered embellishment in its own right:

So, what do you think? Does it sound like a manageable photo / scrapbooking project for 2014?
  • The list is just there to prompt you and you can take it in any order you like. [We're not going from 1 to 2 to 3 etc we're selecting each week which one we fancy! Some structure in a long project like this is useful ... but too much can be restrictive .... so we're just having fun!]
  • Scrapbooking the results on a small scale is a great, quick way to document the passage of time and also to really show off some of your favourite smaller supplies [like the blank tickets I've been using.]
You can always share your pages on your blog and link us up via the 3DJean Facebook page, or by leaving a blog comment.
 
I'm honestly really enjoying having the list to work from ... it's keeping me life-documenting through an otherwise scrapping-desert at the moment!! Maybe it's just what you need too!
 
Julie :-)

Sunday 22 December 2013

Open The Box...

... need some handles...then you can find them here. and the door knob too! Just the right size for this little cupboard.


The papers are Graphic 45.
Effie

Sunday 15 December 2013

More Christmas

 Just a few tags. I don't normally make them but last year Julie made us all a lovely one and I thought I would do the same this year.  
 Here are 6 of them fingers crossed I get time to make another 6 at least. The Pion papers have come in very handy , add them one and a bit of bling and were sorted.  

Tuesday 10 December 2013

Julie: Stencilling with Shimmerz Dazzlerz


Hello again.
 
If you're someone who likes the colours and finishes of the Shimmerz paints ... like this pot of smooth and shimmery Dazzlerz in 'Dreamsicle':
... but you don't generally get involved in painting, art-journaling or what you might call 'messy' crafting ... then here's another, less messy way to use them: with a sponge and stencil.
 
That's how I've been using this glorious rich peachy shade of paint in the album I've made to house my 52 Weeks of Photos:
Sometimes, when I'm feeling in the messy mood I flick or scrape the paint on - but sometimes that method can be a little 'hit and miss' [as in: sometimes it hits the wall and misses the paper!] and it's not appropriate for every project. But that doesn't stop me using paint:
  • instead I've been putting a small amount of the paint on to a craft mat / palette;
  • then taking a section of Cut N Dry foam [often used with inks] and dabbing it into the paint, working it in;
  • then I test it out on some scrap paper - just to make sure the sponge isn't overly filled with paint because I don't want it to ooze out under my stencil;
  • finally, I take a stencil/mask [you can find a selection of masks in the shop here] and position it on to my finished mini scrapbook page, and begin gently sponging through to create the design:
The end result is really very subtle ... compared to the other used you can put these lovely paints to ... but it does add just that slight hint of 'arty-ness' that I'm aiming for on these pages. Here's a closer look:
Obviously, depending on where you position the stencil, you can gain a lot of control over where you want to add some shimmering colour using this technique.
 
BTW: Everyone's welcome to join in the 52 Weeks of Photos project. I use the list [check out the full list of 52 items here] as a way to focus my mind , to make me stop and think each week, then I take a photo which not only represents something on the list ... it also represents something I was doing that week too. You can play along any time whenever you need a prompt to start recording some day-to-day moments. 
 
----------------------------------
 
Don't forget you can now keep in touch with Jean via the 3DJean Facebook page [have you 'Liked' it yet?].
 
If I don't see you before ... Merry Christmas to you!
 

Thursday 5 December 2013

Crackers

Crackers , so it must be getting closer to Christmas. These were made with a piece of card for the body and then crepe paper wrapped round with a snap and present inside. 

Decorated with the Pion christmas papers a bit of bling and they were finished.

Saturday 30 November 2013

Jan: A girl can't have too many bags

can she?

 Well I'm stock piling my bags all ready for the festive season. These kraft bags  make ideal Christmas gift bags. Just the right size for candles/ pot pouri/socks/scarves etc.
I decorated the bags with Pion papers. The sentiment is from the Purple Onion Holiday borders set.I've used the diamante trim to add a bit of bling.
The sparkly snowflake has been decorated with the silver German glass glitter. This stuff is so glittery and Jean has a fantastic range of colours in the shop. The centre is one of the flat backed pearl.

 All in all an easy way to gift wrap your presents.


Tuesday 19 November 2013

Julie: Roses [and tickets] are red


Hi there.

Today's project makes the most of the warm colours and vintage charm of some of the embellishments currently in stock at the shop;
For this birthday card I've used a length of the Rose organza ribbon in red:
I simply trimmed away the mesh backing and added them to my card using a length of double-sided tape. Then, to mirror the vivid shade of scarlet, I added a row of the vintage-style Blank Tickets across the bottom and layered my other embellishments on top:

You get 20 red , 20 blue and 20 white tickets in the £1 pack so there's no need to use them sparingly!
So I sneaked in a few of the white tickets for contrast:
 And here's the finished thing once again:
While mine was a birthday card, the red + white tickets and the red rose organza trim will make the ideal additions to your handmade Christmas cards too!
Julie :-)

p.s: Did you know 3DJean has a Facebook page where you can hear about the newest additions to the shop? You can find it here.

Wednesday 13 November 2013

Twinkle Twinkle...

....Little star..I've dug out this old Sizzix 3D star die.. ( Tim Holtz has a newer version ).. and used some  Pion papers 

The glittery trim is a cheap garland from The Range, chopped up and coloured blue with alcohol ink.


Effie

Saturday 9 November 2013

52 Photos

A quick update on the 52 Photos Challenge......

Number 13.... Something you can't live without....


Number 18 Your Shoes


23 pattern


44 Relaxing with a cuppa


 If you would like to join in then the list is here  and you can find the instructions for the easel book in
this post.
Effie

Friday 8 November 2013

Jan: Take three squares

Hi folks that time of year is fast approaching so I thought I'd share a quick and easy Christmas project that you can use to decorate your home (or if you're really short of time an original handmade gift). 
 Cut 3 squares  of paper a quality weight, the sort you'll find in the shop.Your square can be any size, mine are 15cms.
Now fold in half diagnally to form 3 triangles
 Open the squares out and glue. Start by matching at a point working round until all three squares are attached.


 If you are using the same coloured card then it doesn't matter which order you stick. But if like me you use three different papers then make sure that you get each side different. Not sure what I mean? You will once you start!


Now you have your tree. Decorate as you please but bear in mind that your embellishments need to be light.

I have created a huge rosette from some of the paper and mounted a stamped image. Sorry this was last year's stock but Jean has some lovely Christmas stamps in at the moment. It wouldn't be Christmas without a bit of bling and my all time favourite Christmas border stamp.
Here's one done in the Lily Bee Jingle papers. 

As I said quick and easy. If you make one of these please leave a link so we can have a peek.

ps if you want to see this on a MUCH bigger scale check out my blog.

Today I've used Lily Bee Jingle papers, Purple Onion Holiday Borders stamps, Diamante faux mesh. 

Tuesday 29 October 2013

Julie: Scrapbooking with tickets and texture paints


Hello again.

My project today is scrapbooking page featuring some of the new blank tickets from the shop and some fun texture paints too:
The £1.00 pack of tickets contains 20 each of the red, blue and white [shown here with other colours]:
Ever since I got my pack I've been using them on just about everything I make! And they've been coming in particularly useful in my scrapbooking where they make great blocks for dates:
... and titles: 
Here some of the wording from the Artchix 'Tell Me A Story' Image Sheet  [currently so popular it's out of stock - but check back for restocks or contact Jean!] also came in handy for my page:
And finally, while my page had quite a few paper layers it still felt a bit 'flat' so I added some
of the Shimmerz 'Texturez' paint in 'Sandy Stone' and 'Patina':
It's a very thick texturized paste-like paint which really does keep it's depth when it dries:
To create this effect I scraped it on to my page through one of my favourite stencils - a sheet of plastic embroidery canvas - I just love the grid design it creates.

So, that's my project for today, make sure to visit the shop if you'd like to know more about the products I've used here.

See you next time.

Julie :-)
Related Posts with Thumbnails