 I've used my skull and crossbones border stamp to create the panels on this card. This stamp is so versitile. I've even cut out individual skulls to decorate the edges of the middle panel. To add a bit of bling I've used icicle stickles on the eye sockets! I've also trimmed the edge of the panels with my other favourite Happy Birthday border stamp.
Pages

Wednesday, 28 July 2010
Jan, Tri- shutter cards
 I've used my skull and crossbones border stamp to create the panels on this card. This stamp is so versitile. I've even cut out individual skulls to decorate the edges of the middle panel. To add a bit of bling I've used icicle stickles on the eye sockets! I've also trimmed the edge of the panels with my other favourite Happy Birthday border stamp.
Thursday, 22 July 2010
It's In The Bag!
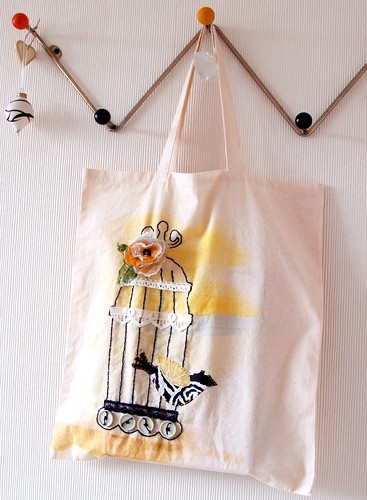
 Or you could take it a step further........ scan your finished ATC and print out onto fabric transfer paper and make this cute bag.... just big enough to hold your lippy and moblie phone!
Tuesday, 20 July 2010
Julie: Cards using 'Sweet Pea' stamps
.JPG) I got to play with some of the newest additions to the 3DJean.co.uk stamp section just as they went on sale in the shop. These are my cards featuring the new 'Silk Dance' stamp from Sweet Pea designs:
I got to play with some of the newest additions to the 3DJean.co.uk stamp section just as they went on sale in the shop. These are my cards featuring the new 'Silk Dance' stamp from Sweet Pea designs:  I coloured in the stamped image using ProMarkers, not always using especially 'natural' colour ways, which seems to work well with the fantasy feel of the designs. Here I built up three stamped images using a mask:
 The backing papers used on all of these cards are actually off cuts from Effie. They're papers which she'd handcreated, turned into a journal for herself and then donated the leftovers to me at the crop!
 I used an EK Success binder edge border punch to help with the feeling I wanted to create on these cards - which was something like 'daydreaming and doodling in your school folders'!
.JPG) I also added to that feel with the birdy paper clips I found in my office drawers!
I also added to that feel with the birdy paper clips I found in my office drawers! My final touches were ribbons and sentiment stickers which I placed inside a Purple Onion 'Labelers' stamp available in a set of four in the shop:
 So, that's the 'Silk Dance' Sweet Pea stamp for you .... if you'd like to see some examples using the 'Misty Reflection' design hop over to this post on my blog right now!
See you over there. Race you ....
Julie :)
Sunday, 18 July 2010
A Savoury Dish
To start you need to bake blind a pastry case or buy one , about 8inch dish. I buy frozen pastry these days as its so much easier for me as the 2 things I cant make are yorkshire puddings (tried every recipe under the sun)and pastry.

Then chop and fry 2 medium leeks , place these in the bottom of the pastry case

Now crumble over the leeks 6oz Blue Stilton cheese

Mix together in a jug 2eggs and a small carton of single cream , pour over the top of the leeks n cheese

pop in the oven at gas 5 for about 25-30mins , eat and enjoy

Wednesday, 14 July 2010
It's Never Too Early!
I'd searched and searched for vintage glass glitter and the nice lady at 3djean said if she could find some then she would get some........and she did! it's fabulous stuff!
So what did I make... a vintage snowman and here's how.
Take two different sized balls, these can be made of anything, these are compacted cotton paper. Cover in PVA glue and roll them in that fabulous silver chunky glitter. Gather a few twigs ( for his arms), paint them white.

 For his hat.. cover the cap of a glue stick with black card, cut a larger circle for the brim and glue together
 Using a cocktail stick about 3cm long push half in his head and the other half in his body, stick in his eyes and nose. Sharpen the ends of his arms and glue in the body. Add some small buttons. Give him a scarf made from any kind of fibres or ribbon. Using a small length of dowel mount him on a square block of wood...........or use a cotton reel to sit him on ( this was my first intention!)
Sunday, 11 July 2010
Sweet Pea

Some are quite cute but also with a bit of GOTHIC thrown in , so that's why I just had to start stocking them.

I used the Red Hearts and the Exotic Halloween from the range.

Saturday, 10 July 2010
Pretty Butterflies ...
Friday, 9 July 2010
Julie: Alter-A-Bag kit
- the 'Alter-A-Bag' kit and
- the 'Alter-A-T-shirt' kit,
... and they come complete with everything you need to create your own bird-cage themed customised project.
In previous posts Effie, Jean and Jan have all shown you theirs ... now it's my turn to show you mine:
This particular project kit is one of Effie's mini-masterpieces which she created and shared with all of us who attend 'Efermera Ink' our monthly, local crafting group a few weeks ago. I really enjoyed making my birdie bag at the time, so it's nice to get to share it with you now:
While you don't actually get Effie herself posted out to you in person to help you make your bag/T-shirt, you do get full details, instructions and photos to show you what's what! I faithfully and obediently followed Effie's demonstrations except for when it came to adding my bird. Call me contrary ... but ...
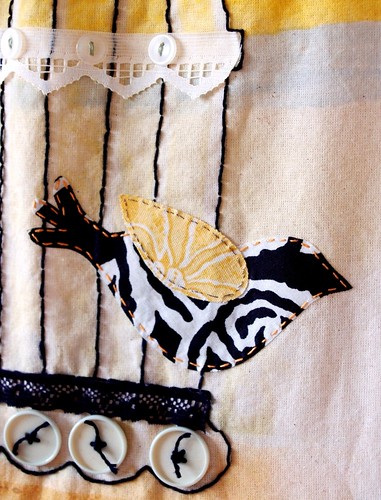
... when I looked at everyone elses birds facing into their cages, I decided to have mine hopping out instead, a decision which possibly tells you quite a lot about me!!
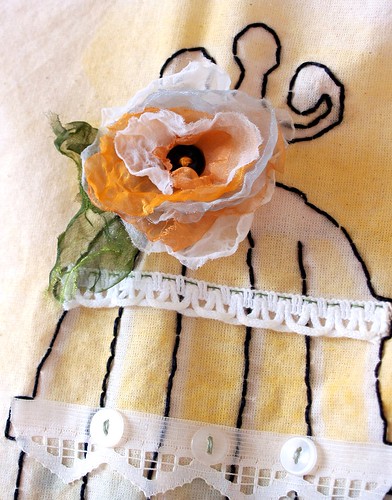
I loved making the flower [above] but I won't spoil it for you by telling just what the technique is used to achieve such a professional look [you'll get the instructions in the kit]. Again, it's one of Effie's gems of crafting wisdom! Like the way she introduced me to iron-on dyes:
I didn't know there was such a thing as dyes you could iron-on until I started attending Effie's crafting group. And yes, it is as much fun as it sounds!
All you need is a regular iron, the kind you use for ironing clothes - if you can imagine doing such a thing - and you can create surface patterns and colours that you would have thought you had to go to art college to learn about.
I enjoyed using the Kemtex dye colour sheets so much that Effie let me take some home to play with ... she's kind to me like that! And play I did.
In fact I played for so long that I think I might have worn out my iron as it now makes strange growling noises when it gets hot ... they're a lot of fun ... don't say I didn't warn you!
So, for all of those of you who don't get to attend Effie's workshops in person, why not let Jean provide you with the next best thing through one of the bag or the T-Shirt kits.
Really the only thing missing is the tea and laughter we also have when we all get together ... it's a shame we haven't found a way to send you some of that in the mail ... but we're working on it ...
See you soon.
Julie :)
Thursday, 8 July 2010
169 days to go......

 I'm not a needlecraft person but even I managed the back stitch on this. The flower was made by roughly cutting out chiffon circles and melting with a heat gun. Take care not to over do otherwise you end up with a shrivelled mess.!
Jan
Tuesday, 6 July 2010
Bags to Dye for!

The dye is ironed through a stencil...the design is then hand embroidered, the bird appliqued, embellishments added and hand made flowers attached........
 If all this seems complicated then 3djean makes it easy........there is a kit available!
 If you don't want a bag............. how about a t-shirt
 Colour fastness is not guaranteed .. so hand wash in cold water
PS... It's not me in the picture...............just some random woman!
Saturday, 3 July 2010
Jan: Spring card Tutorial
 You can make this card any size as long as the length of the card is twice it's width. My sample is 5" x10". Below is a photo tutorial to help you .
Fold the card in half so that it forms a square.
 Now fold one half in half again.
 Open out flat.
 Take the bottom left hand corner and fold across the card in line with the second fold. Use a bone folder to make the crease.
  Open out flat.
Repeat the fold but this time top left hand corner down . Again use the bone folder to sharpen the crease.

Open out flat. I have turned the card so that the folds are now on my left. Why didn't I start that way ? Don't ask. Now find the central point on the right hand side and mark.

Using the central point cut back towards the folds to create a point.

Now the tricky bit push the two side folds in over to form the diamond. The left hand section folds forward to make the platform. If you're still with me you're nearly there!

See now you can see where we're going.
 Almost there , decorate the platform first as you are going to secure the diamond to this using double sided tape. Sorry the photo's a bit naff but I promise you there are two strips of tape on the underside of the diamond.


